Search Continue Running in the Background Sumologiv
Managing Your Sumo Logic Library
You can save, share, and manage Searches, Dashboards, Apps, and other Sumo Logic content in the Library. The Library also allows you to launch searches and Dashboards with a single click—speeding up access to the searches you find yourself running consistently. Additionally, you can use the content that others in your organization have already developed to continually discover new insights in your data.
Open the Library page to expose additional search options and to organize and manage Library contents.
To open the Library page, click the Library (folder) icon at the top of the UI. 
You'll see two View as options:
- Me: See your own saved searches and dashboards.
- Content Administrator: Available if you have a Sumo role that grants you "Manage Content" capability, this option turn off your personal content in the Library and allow you to see the entire Sumo file tree. In this mode you can migrate content from one location to another, as well as highlight important content in the Admin Recommended folder. For more information, see Admin Mode.
Once you've made your choice of what you want to see, you can enter a string in the Search bar to display matching search results.
Explore the Library
Open theLibrary page to expose additional search options and to organize and manage Library contents.
To open theLibrary page, click theLibrary icon at the top of the UI.
![]()
Select Personal to select your own saved searches and dashboards, or Org to select those shared by others in your organization.
Do the following from theLibrary page:
-
Select Personal to select your own saved searches and dashboards or Org to select those shared by others in your organization.
-
Enter a search string to display matching search results.

-
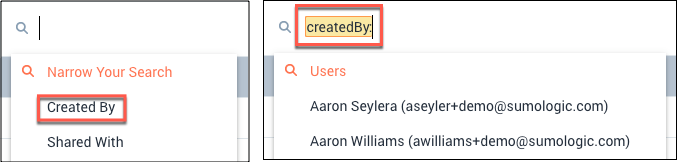
Narrow your search by selecting an option forCreated by orShared with. As you make your selections, the constructed query is entered into the search field and additional options are presented.
-
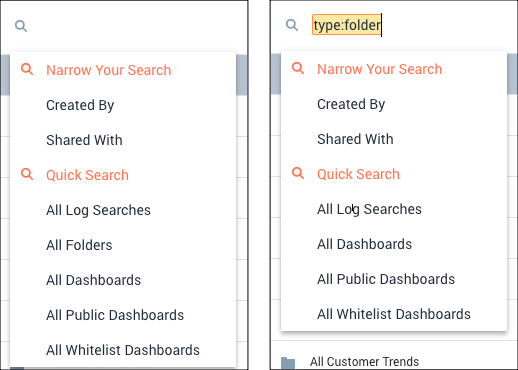
Select aQuick Search option to perform a quick search for log searches, folders, or Dashboards. As you make your selections, the query you have constructed is entered into the search field.
Organize the Library
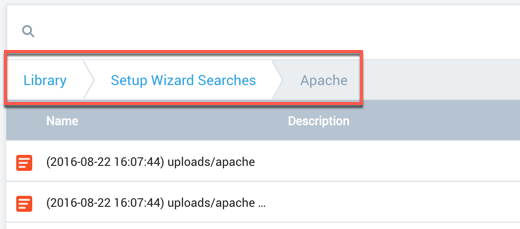
Folders are available for organizing content in the Library. Some folders are set up automatically; for example, a folder is created automatically for Setup Wizard searches. You can also create custom folders and move items among folders.
The path to the current Library folder is shown near the top of the Library page.
To create a new folder, clickNew Folder, enter the folder name and an optional description, and clickAdd.
To get information on items in the library, click an item in the Library to open an information panel. If you click a folder in the Library, information about the folder is shown in the information panel. Double-click the folder to list the items that it contains.
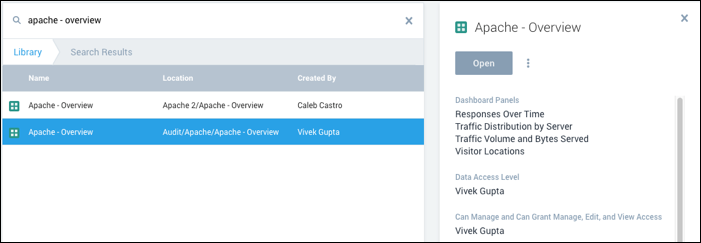
Do any of the following from the Information panel in the Library:
- ClickEdit to modify the name or description of the item.
- Click theTrash icon to delete the item from the Library. Deleting an item from the library means that the search, Dashboard, or folder is no longer available.
- Click the dottedMore icon and selectExport to open a window with the JSON code for the item, which you can copy or download.
- Click the dottedMore icon and selectCopy to make a copy of the item. Select the location in the Library to copy it to, and clickCopy.
- ClickShare orUnshare to change the sharing settings for the item.
- ClickMove to move the item to another folder in the Library. Select the new location, and clickMove.
Personal Folder
You can add folders and subfolders to the Library in order to organize your content for easy access or to share content.
In the Library, yourPersonal folder is the root folder for all your saved content. Any time you save a search, a dashboard, or install an app, it is automatically saved here in a flat folder structure, ordered alphabetically.
The left nav gives quick access to all the items in the library. Click an item to open it.
Select Personal to show your own saved searches and dashboards.

Select Shared With to show the searches and dashboards shared with others in your organization.
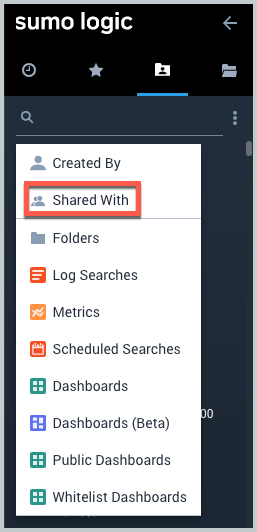
The left nav also includes shortcut tabs.

- Click theFolder icon to list all items in the library, and use theSearch field as needed to narrow your search in the library.
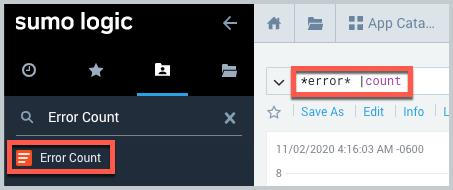
- Click theRecent icon to list all currently running searches and any searches performed over the last three hours. Pinned Searches are also listed.
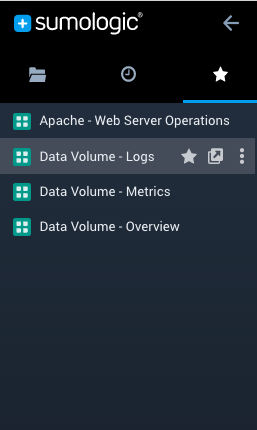
- Click theFavorites icon to list searches and Dashboards that you've marked as favorites to keep handy. To add an item to Favorites, hover over the item in the left nav and click the star, which changes to solid which. Click again to unfavorite.

Add Folders
To add a folder to the Library:
-
Click the Library icon
 at the top of the UI.
 -
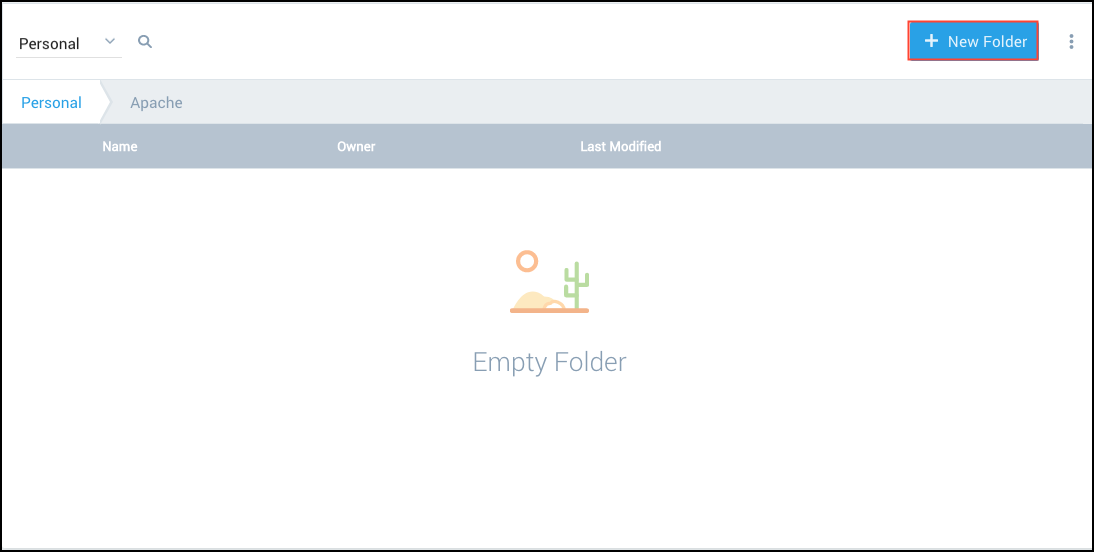
Click New Folder.

-
In theAdd Folder dialog, enter a name for the new folder, and clickAdd.

-
The new folder is added to the folder list in alphabetical order.
Move Content in Personal Folders
In your Personal Folder, you can move your saved content, for example, to organize searches and Dashboards into subfolders.
To move content:
- Select the item you want to move, click the details icon to the right of the name, and from the menu, selectMove.
- In theMove Item dialog, select the location you want to move the content to, and clickMove.

The item(s) will be moved and appear in the new location.
When your content is moved, you'll need to click the folder where it is now located to view its contents in the list on the right.
Add Subfolders
- Create a subfolder by clicking New Folder in your Personal folder.
- In theAdd Folder dialog, enterMy Apps, and clickAdd. The new subfolder is added to the folder list.
Move Content into Subfolders
Now you can organize your saved content in the new subfolders.
- From your Personal folder, select the item you want to move. Click the details icon and select Move.
- In theMove Item dialog, select your desired folder and clickMove.

- Do the same for any other Apps you have installed. They will be moved and then appear under theMy Apps folder.
- Now move any searches or Dashboards that deal with errors into the newErrors subfolder. You can tell what the list items are from their icons: a search uses a magnifying glass icon, a Dashboard uses a picture icon, and an App uses a folder icon.
When your saved content is organized, you'll need to click the subfolder to view its contents in the list on the right.
If want to share the apps you have installed in order to share them with your organization, you can share your entire MyApps folder. This way, any app that you install in the future to this subfolder would be automatically published and shared with your team.
To publish a subfolder:
- Select MyApps, click the details icon.
- Click Share.
- The Share Folder dialog appears. Choose Your organization to share with. Anyone in your org will be able to see this folder.
- Click Save. The MyApps folder is added to theOrg folder, in a subfolder labeled with your name. Now everyone in your organization can access your published content.
In the future, any Apps that you install in this published folder will be automatically published. If you want to create a folder hierarchy, create the desired hierarchical subfolders and publish the topmost folder. All subfolders will be published with the parent folder.
Favorites
Keep track of content you use regularly with Favorites, or content that you want to keep handy. Just click the star icon for your saved search, dashboard, installed app, or folder, and it will be saved to theFavorites tab in the left nav for easy access.
You can also favorite saved searches from theSearch page, and favorite Dashboards from theDashboards page.
There is a limit of 20 favorite items per user.
Mark content as favorite
-
Go to the Library.
-
Click the star icon to the left of your search, Dashboard, app, or folder.
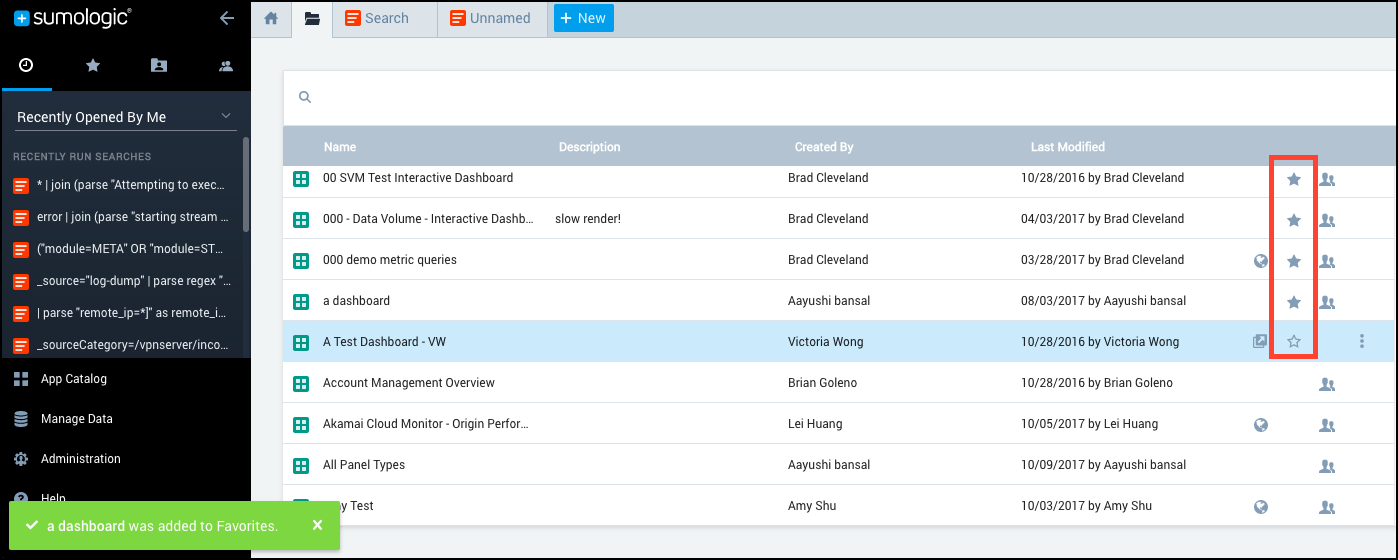
-
The star darkens, and the item now appears on theFavorites (star) tab.
Perform actions on favorites
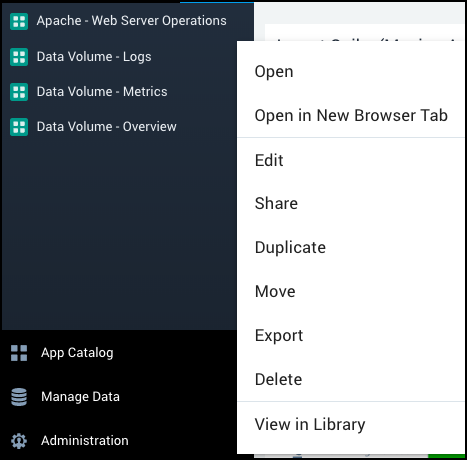
If you own the content you can perform the following actions on folders in your favorites:
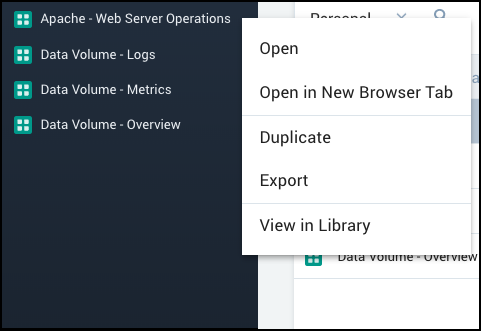
If the content was created by another user and published, you can perform the following actions:
Unfavorite content
- Go toLibrary > Favorites.
- De-select the star icon to the left of your search, dashboard, app, or folder.
- A dialog displays showing that you unfavorited the item, and the item is removed from theFavorites folder.
Search the Library
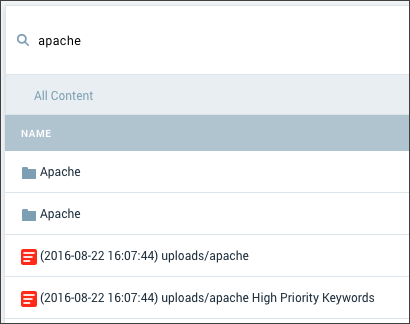
To find Sumo Logic content you have saved in the Library, you can search the Personal and Org folders using the search field.
You can search on the:
- Content name
- Content description
In the Library search field, you can use keywords and wildcards ( * ), though leading wildcard searches ( * ab) are not supported. You can add one or more keywords. With multiple keywords, the default assumed operator is AND, not OR.
You can also search for Content types in the Personal folder using the following prefixes:
- type:search - Finds all searches.
- type:search keyword - Lists all the searches that match the keyword.
- type:search is:scheduled - Finds all scheduled searches that you own.
- type:search is:scheduled keyword - Finds all scheduled searches that you own, which match the keyword.
- is:scheduled - Finds all scheduled searches that you own.
- is:scheduled keyword - Lists all scheduled searches that you own, which match the keyword.
- type:folder - Finds all folders.
- type:folder keyword - Lists all folders that match the keyword.
- type:dashboard - Finds all Dashboards.
- type:dashboard keyword - Lists all Dashboards that match the keyword.
Limitations
- Library Search is only supported in the Personal and Org folders.
- Content type search is only supported in the Personal folder.
- Leading wildcards (
*ab) are not supported. - For multiple keywords, the assumed operator is AND, not OR.
Search content in the Library
- In Sumo Logic, go to theLibrary.
- Select thePersonal orOrg tab.
- In the search field at the top of the right-hand panel, enter your text. You can use any of the following:
Recent searches
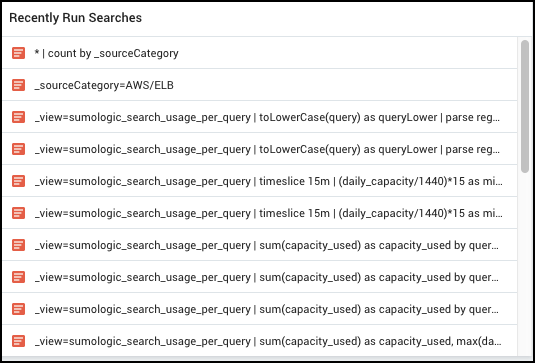
When you run a search in Sumo Logic, that search and its results are saved automatically in the Library under the Recent tab. This is useful in case you lose your browser session, accidentally close the Search tab, log out, or just want to refer to a search you performed recently.
Recent Searches that are still running are paused after 15 minutes. If not reopened or restarted, the search is deleted after three hours.
The Home page lists all currently running searches and any searches performed over the last three hours:
Pinned searches
The Pinned Search feature allows you to start a search, then "pin" it, so it will continue running in the background independent of the browser session. Then, you can close the Search tab or log out and find your results later in the Library on the Recent tab in a folder named Pinned Searches.
Once pinned, a search will run in the background for up to 24 hours. If it has not finished by then, it will be paused. There is no notification when your search is paused, but you can just restart the search to continue the query. Search results are available for three days.
There is a limit of ten pinned searches per user. Also, queries that use the save operator cannot be pinned.
A search must be started in order for the pin button to show up in the Search tab. Once a search is pinned, you can easily unpin it, or remove it from the Pinned Searches tab. In the Pinned Searches folder, you can view theName,Status,Elapsed Time, and monitor theProgress of each search.
There is a known issue that may cause Pinned Searches to be lost when Sumo Logic performs an upgrade. For information on Scheduled Maintenance for your deployment, see Sumo Logic Status.
Pin and unpin a search
-
Enter a query in the search box and click Start.
-
Click the three-dot icon and clickPin from the provided options.

A message displays that tells you where you can find it later in the Library.

The Pinned Search is named by default with the name of the search tab.
-
To change the name of the pinned search, double-click the Search tab to activate the name field and enter a new name.
-
To preserve the pinned search, follow the steps in Save a pinned search.
-
To unpin the search, click Unpin in the menu bar.

Save a pinned search
When you save a pinned search, it appears in your personal folder in the left navigation bar.
- Click the name of the search to open it in theSearch tab.
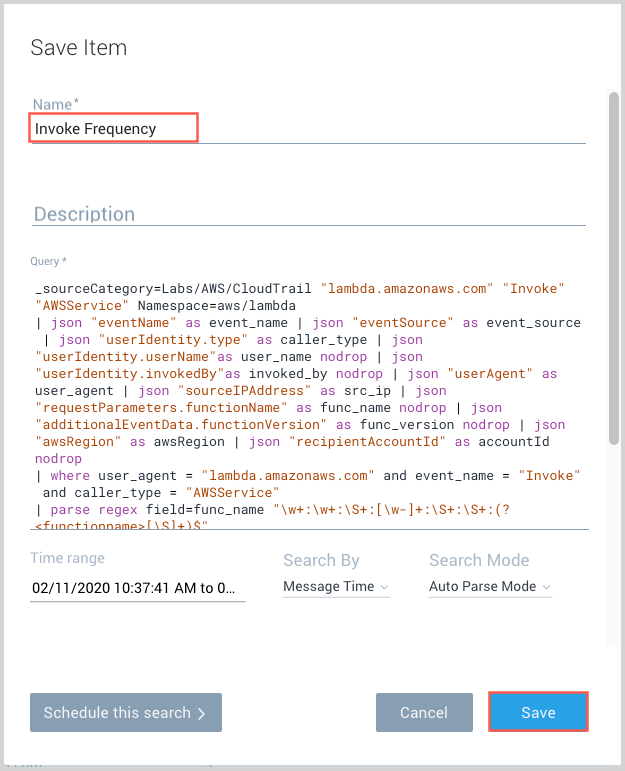
- In theSearch tab, click the three-vertical dot icon and click Save As from the provided options. The Save Item dialog appears.
- Enter a unique Name in the text field. In our example below, we entered Invoke Frequency.
- Optionally, enter a Description.
- Click Save.
The search is saved to yourPersonal folder.
Manage pinned searches
This section shows you how to open previously pinned searches, rename a pinned search, and remove a search from the pinned search list,
To open a previously pinned search:
- In thePinned Searches tab, click the name of the search.
- The search query and any existing results are displayed in theSearch tab.
- To run a new instance of the search, change the Time Range Expression, and clickStart.
To rename a pinned search:
- In thePinned Searches tab, click the name of the search.
- The search query and any existing results are displayed in theSearch tab.
- Double-click theSearch tab to reactivate the name field.
- Enter a new name and pressEnter.
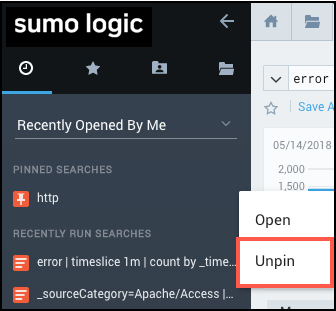
To remove a search from the pinned search List:
-
Hover over the search, then click the three-dots to the right of the name.
-
ClickUnpin.
-
In theConfirm dialog, clickOK.
The search is removed from the list of Pinned Searches.
Removing an instance of a Saved Search from the list in the Pinned Searches tab does not delete the Saved Search from your Personal folder.
Once you've saved content, you can choose to share it, which makes it available to other users. Your shared content is automatically added to the Library in the Org > [ Your Name ] folder.
To share a search and its results, see Share a Link to a Search.
Once shared, other users in your organization can:
- Search for and find your shared search.
- Click your search to run it in the Search page.
- Copy your search to save and edit it.
- Export the text of your search.
Searches and Dashboards can be shared and unshared at any time. Additionally, other users can copy what you've shared and make further customizations.
-
In yourPersonal folder, highlight a search and click the share icon.

-
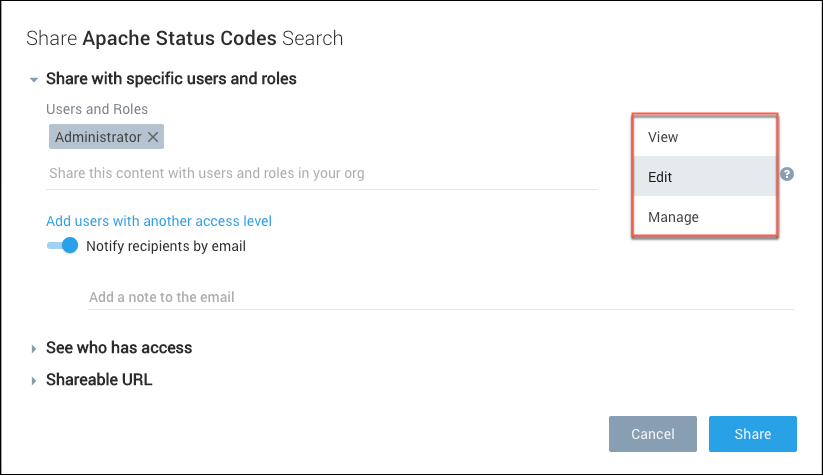
On the sharing popup, click in the Share this content... field.
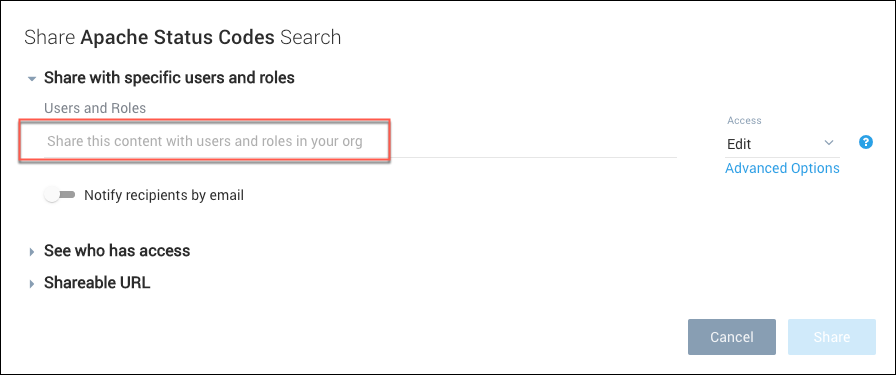
-
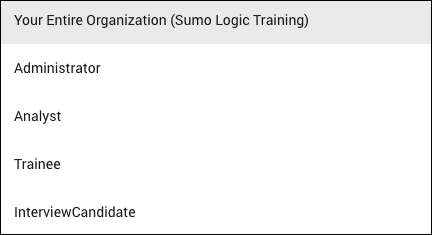
You can share the search with Your Entire Organization, or any combination of roles and users
-
The default permission level is Edit. Use the Access pull-down to select a different permission level. For information about permission levels and advanced options, see Available Permission Levels.
-
You can share the search with a different set of users and roles, and different permission level. To do so, click Add users with another access level, and repeat steps 3 and 4.
-
Click Share.
Unshare
-
In the Library, highlight a search and click the share icon.
-
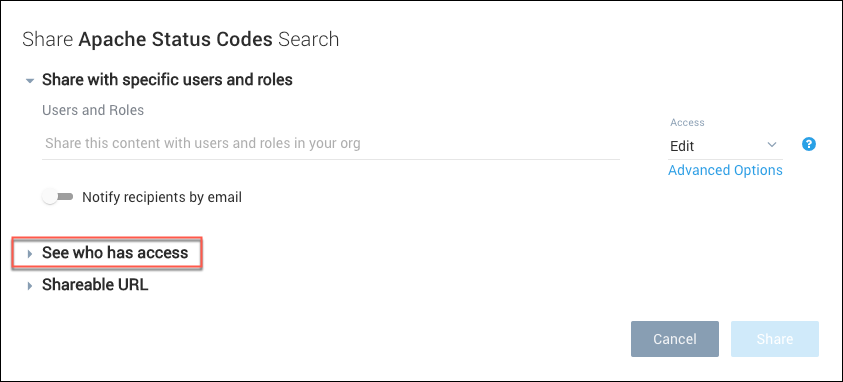
Click See who has access.
-
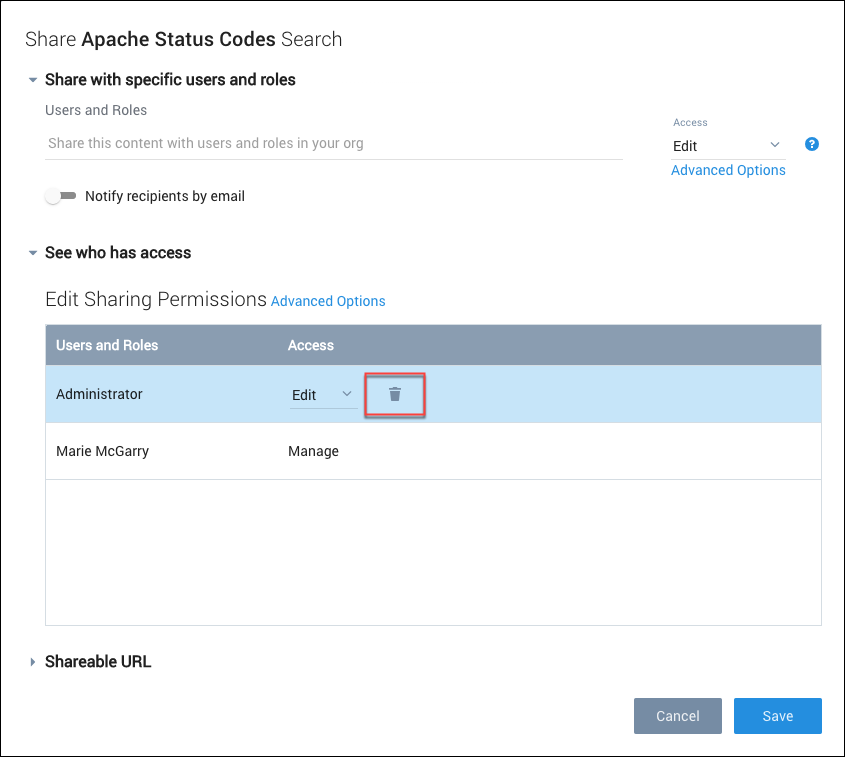
Click the trash can icon to unshare the search with a user or role.
-
Click Save.
Import and Export Content in the Library
In the Library, you can export content as JSON, including whole folders with subfolders, saved log searches, saved metric queries, and Dashboards. Then you can import the content as JSON into the same or another Sumo Logic organization.
The Export and Import functions are provided in order for you to transfer data immediately. The Sumo Logic JSON format may change without notice. There is no guarantee that you will be able to import the JSON in the future.
limitations
- Recent Searches, Favorites, Scheduled Views, Partitions, Field Extraction Rules (FERs), and lookups are not supported.
- For content that is shared, only the content is imported, not the Shared state. You can share it again as necessary.
- All content names must be unique within a folder in the Library.
- Only error free JSON will import successfully.
- Import is limited to 1000 objects at a time.
- For IE 11, in the Export Content dialog, the Download button is not available, due to the default IE 11 security configuration, which blocks this kind of download.
Export Content
- In the Library, do either:
- To export an item, navigate to it, click the details icon for that item, and select Export.
- To export a whole folder (with any subfolders), click the details icon for that folder select Export.
- In the Export Item dialog, do either:
- Click Copy to send it to the clipboard.
- Click Download to download the content as a JSON file.
- Click DONE to close the window.
If you modify your JSON manually after export, we recommend that you use JSONLint to confirm that you are importing valid JSON.
Import Content
- Navigate to the folder into which you want to import the library item.
- Select Import from the options menu.
- In the Content Import dialog, enter Name. The item name must be unique with a folder. Check your JSON before importing to make sure that there is no organization-specific content. All content names in an organization must be unique. If the name is not unique, you will get an error that prevents you from importing the content.
- Paste the JSON you copied from the JSON dialog to the clipboard, or from the JSON file you downloaded.
- Click Import. The Import button is only available if you have pasted in a valid JSON.
Library Filters
You can search through the content in your library with these three main filters. The filters can also be used in tandem, allowing you to filter through filtered content.
Created By
When selected this filter shows a list of users in your network. Once a creator is selected only content created by this user will show up in your search.
Shared With
When selected this filter shows a list of users in your network. Once a user is selected only content that was shared with this user will show up in your search.
Type
When selected this filter shows a list of different types of content within the library. Once a type is selected only that type of content will show up in your search.
Source: https://help-opensource.sumologic.com/docs/get-started/library/


Komentar
Posting Komentar